
This text is only helpful to those with a bit experience on origami design. If you want to learn from start, I recommend other sources.
These are my experiences, they may differ from yours.
Functions of Paper
Apart from being the material you use for folding, in every model, paper can be used in two ways. Either it is visible or not.
The key issue of designing a new model is using “invisible” areas to make the “visible” ones look as good as possible


The crease pattern of my Marmot HP V1 , Bear V1 and Parrot V3 with the visible areas coloured grey. As you can see, most of the visible areas lie on bigger surfaces and are recognizable in the folded state. (Pictures taken from Flatfolder)
Four phases of a model
Even though I don´t follow a set path when designing a new model, most of my creations went through the following phases.
Setting your aim
It may seem trivial, but in my experience it´s definitely not.
The process for designing every single one of my models started with wanting to fold the subject. Often, I have a specific feature in mind, when starting the models. For the griffon it was the wings, for the flower pot, the way to connect plant and pot. Then I try to get a clear and complete vision, I aim at. Simply imagining may work, especially for the second or third version, but still, I sometimes overlook things. Therefore, I often drew an abstraction. That gives you an overview and you can easily check, what’s wrong if the crease pattern causes problems. A good abstraction features
- Proportions, preferably written or drawn in
- A sketch of uncreased areas
- Extra space where it is needed (e.g. to make the back three-dimensional)
I never did it, but in theory, you can also test an abstraction. If you can shape the abstraction into the desired model, it is a good one.
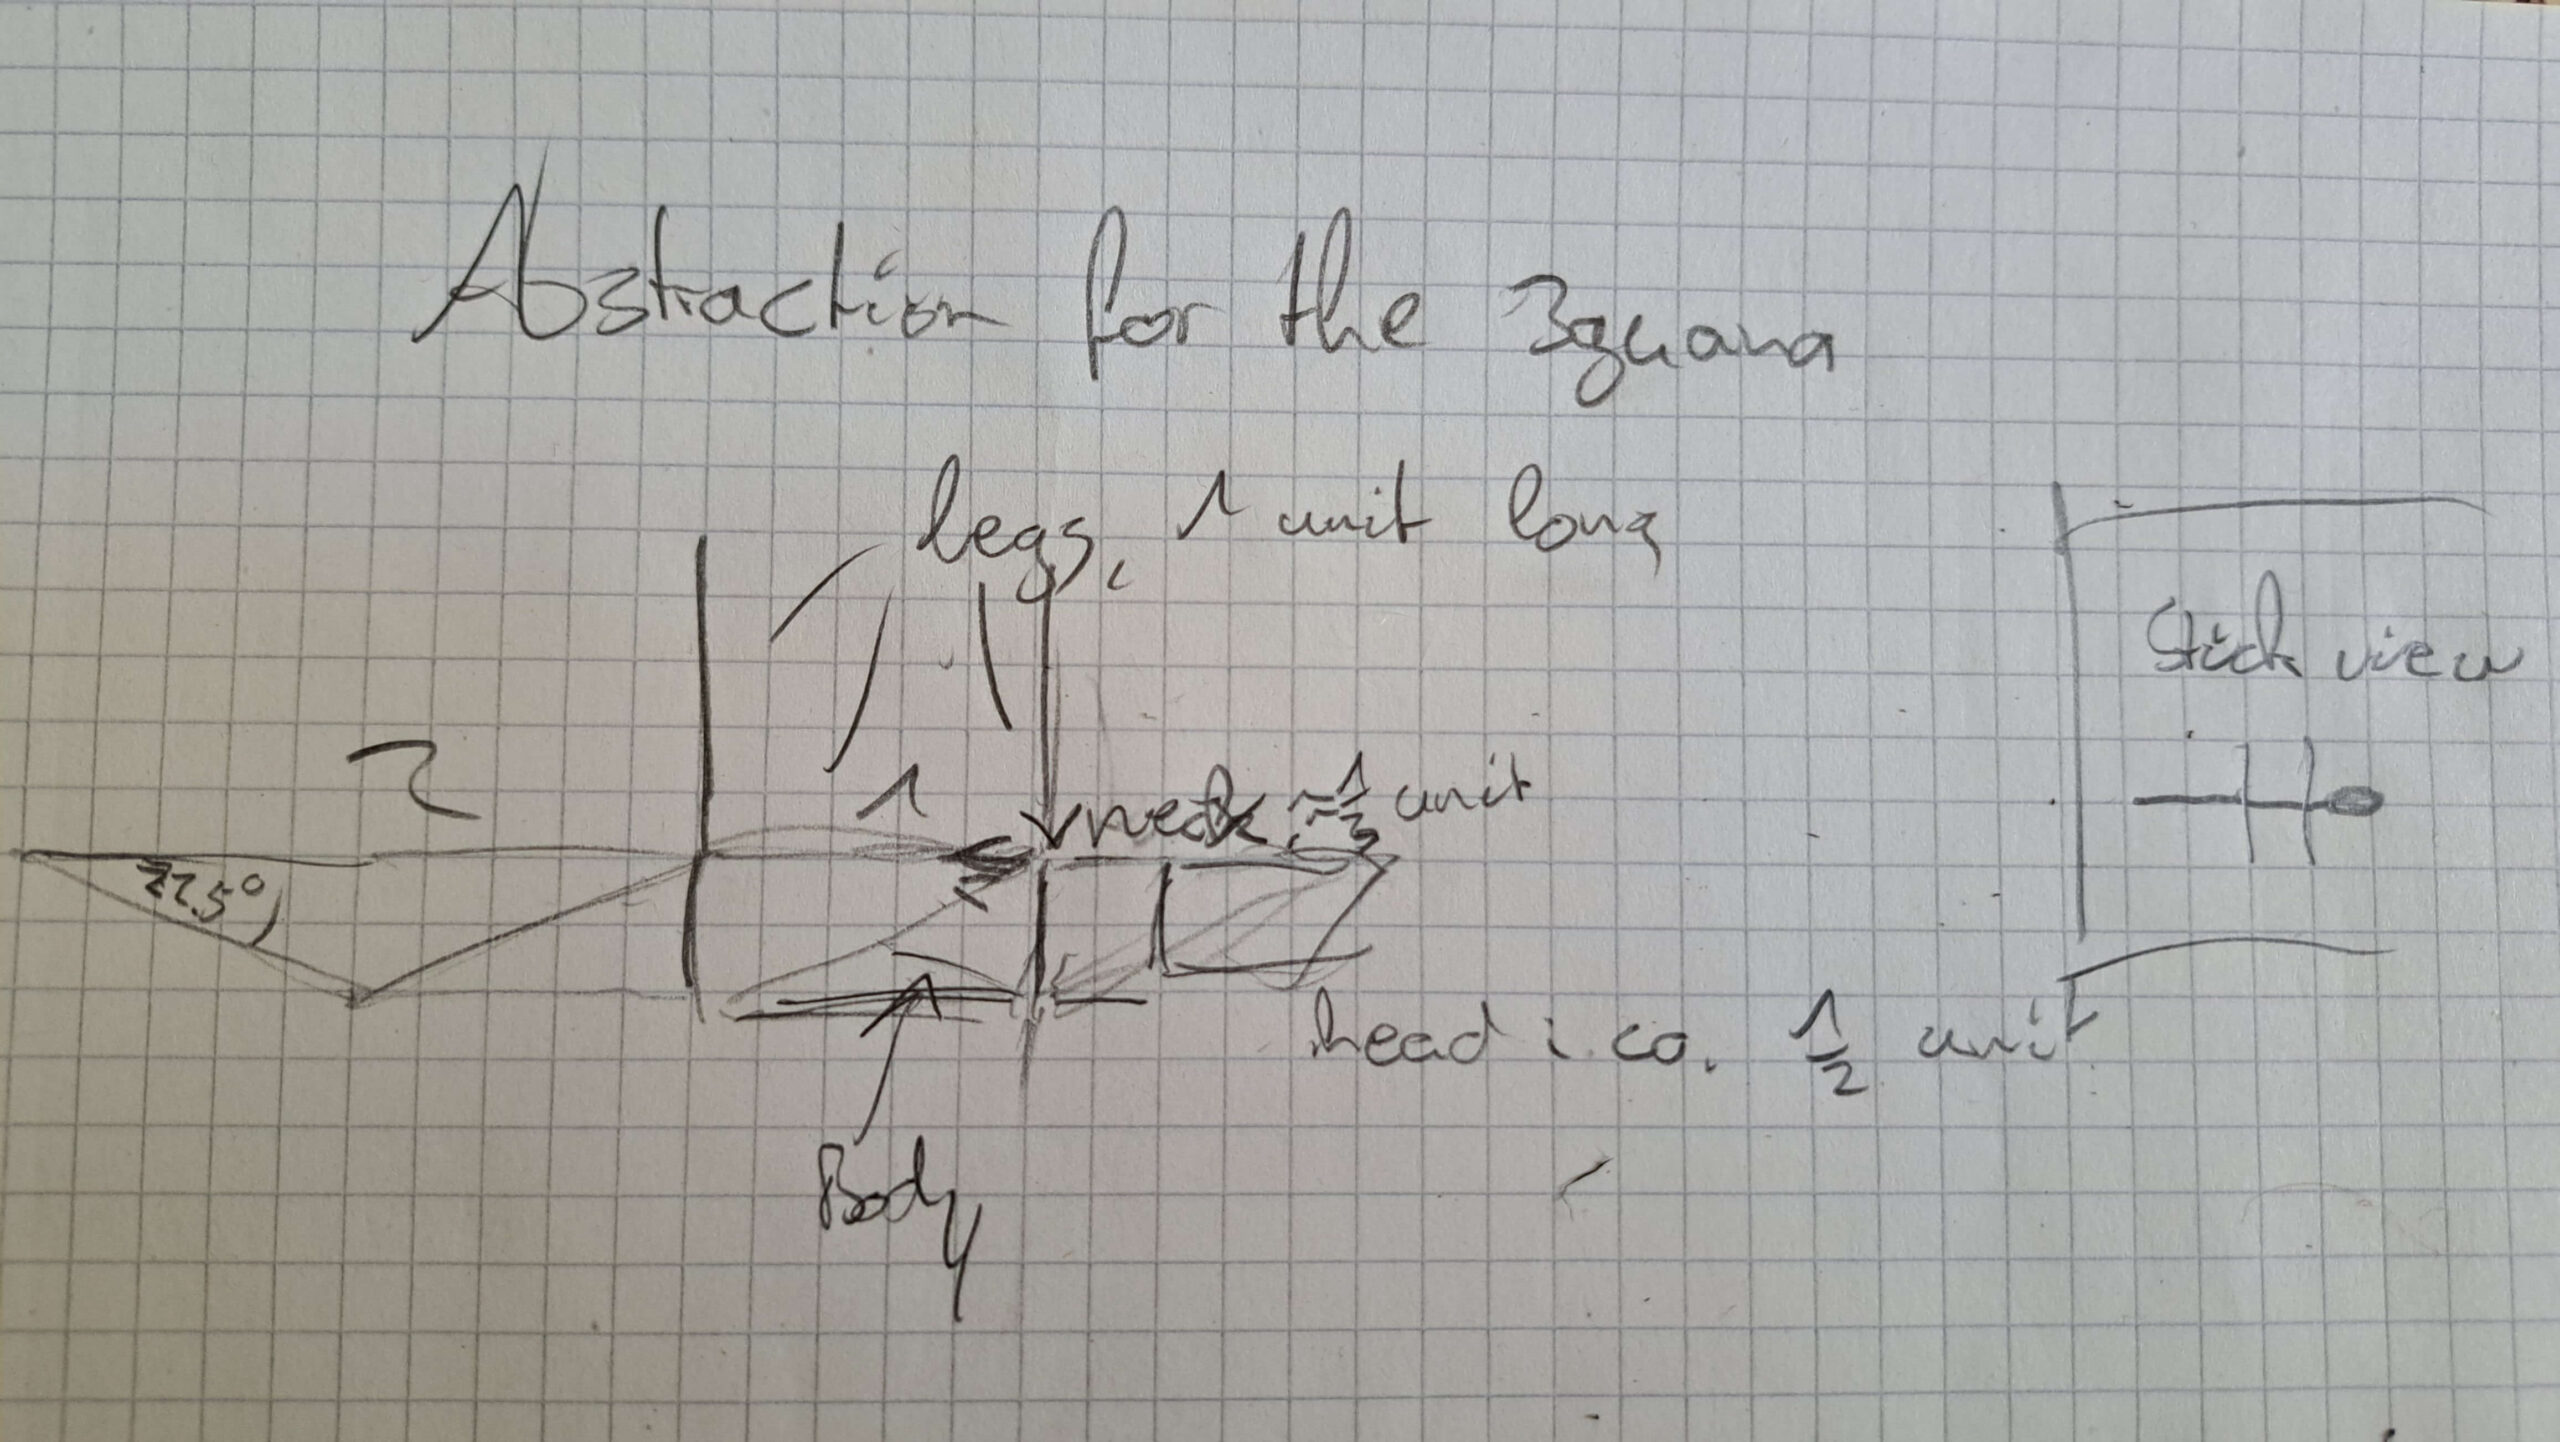
The abstraction for my Iguana V1
Drawing an abstraction, you can easily decide, wether the model will be realistic, abstract, minimalistic, like a drawing/comic etc.
Notes:
Just because you have something to aim at does not mean, the aim can´t change any longer. Several of my models changed drastically during the rest of the design process. I even prefer to make the details by playing with paper, the aim just helps to get a start.
Abstractions in design theories:
Circle Packing including Tree Theory uses a stick figure (=abstraction) to define the
“visible paper” forming the surfaces . This leads to a basic crease pattern that can be easily modified to form the desired (not stick-figure-like) surfaces.
Most often, you use Polygon Packing (Boxpleating, Hexpleating…)to recreate abstractions on any grid. It works best for abstraction similar to a stick figure (e.g. for athropods), but you can also recreate any two-dimensional abstraction using some rules of Polygon Packing. We call this eg. Unaxial Boxpleating or Unaxial Hexpleating etc.
Think of a general layout
What is that?
It doesn´t matter, which theory you use when designing a new model, you always need to assign every area in the folded model an area in the paper.
For me, a general layout is a rough sketch of the packing (circle/ river arrangement). It doesn´t feature a grid or any details whatsoever.
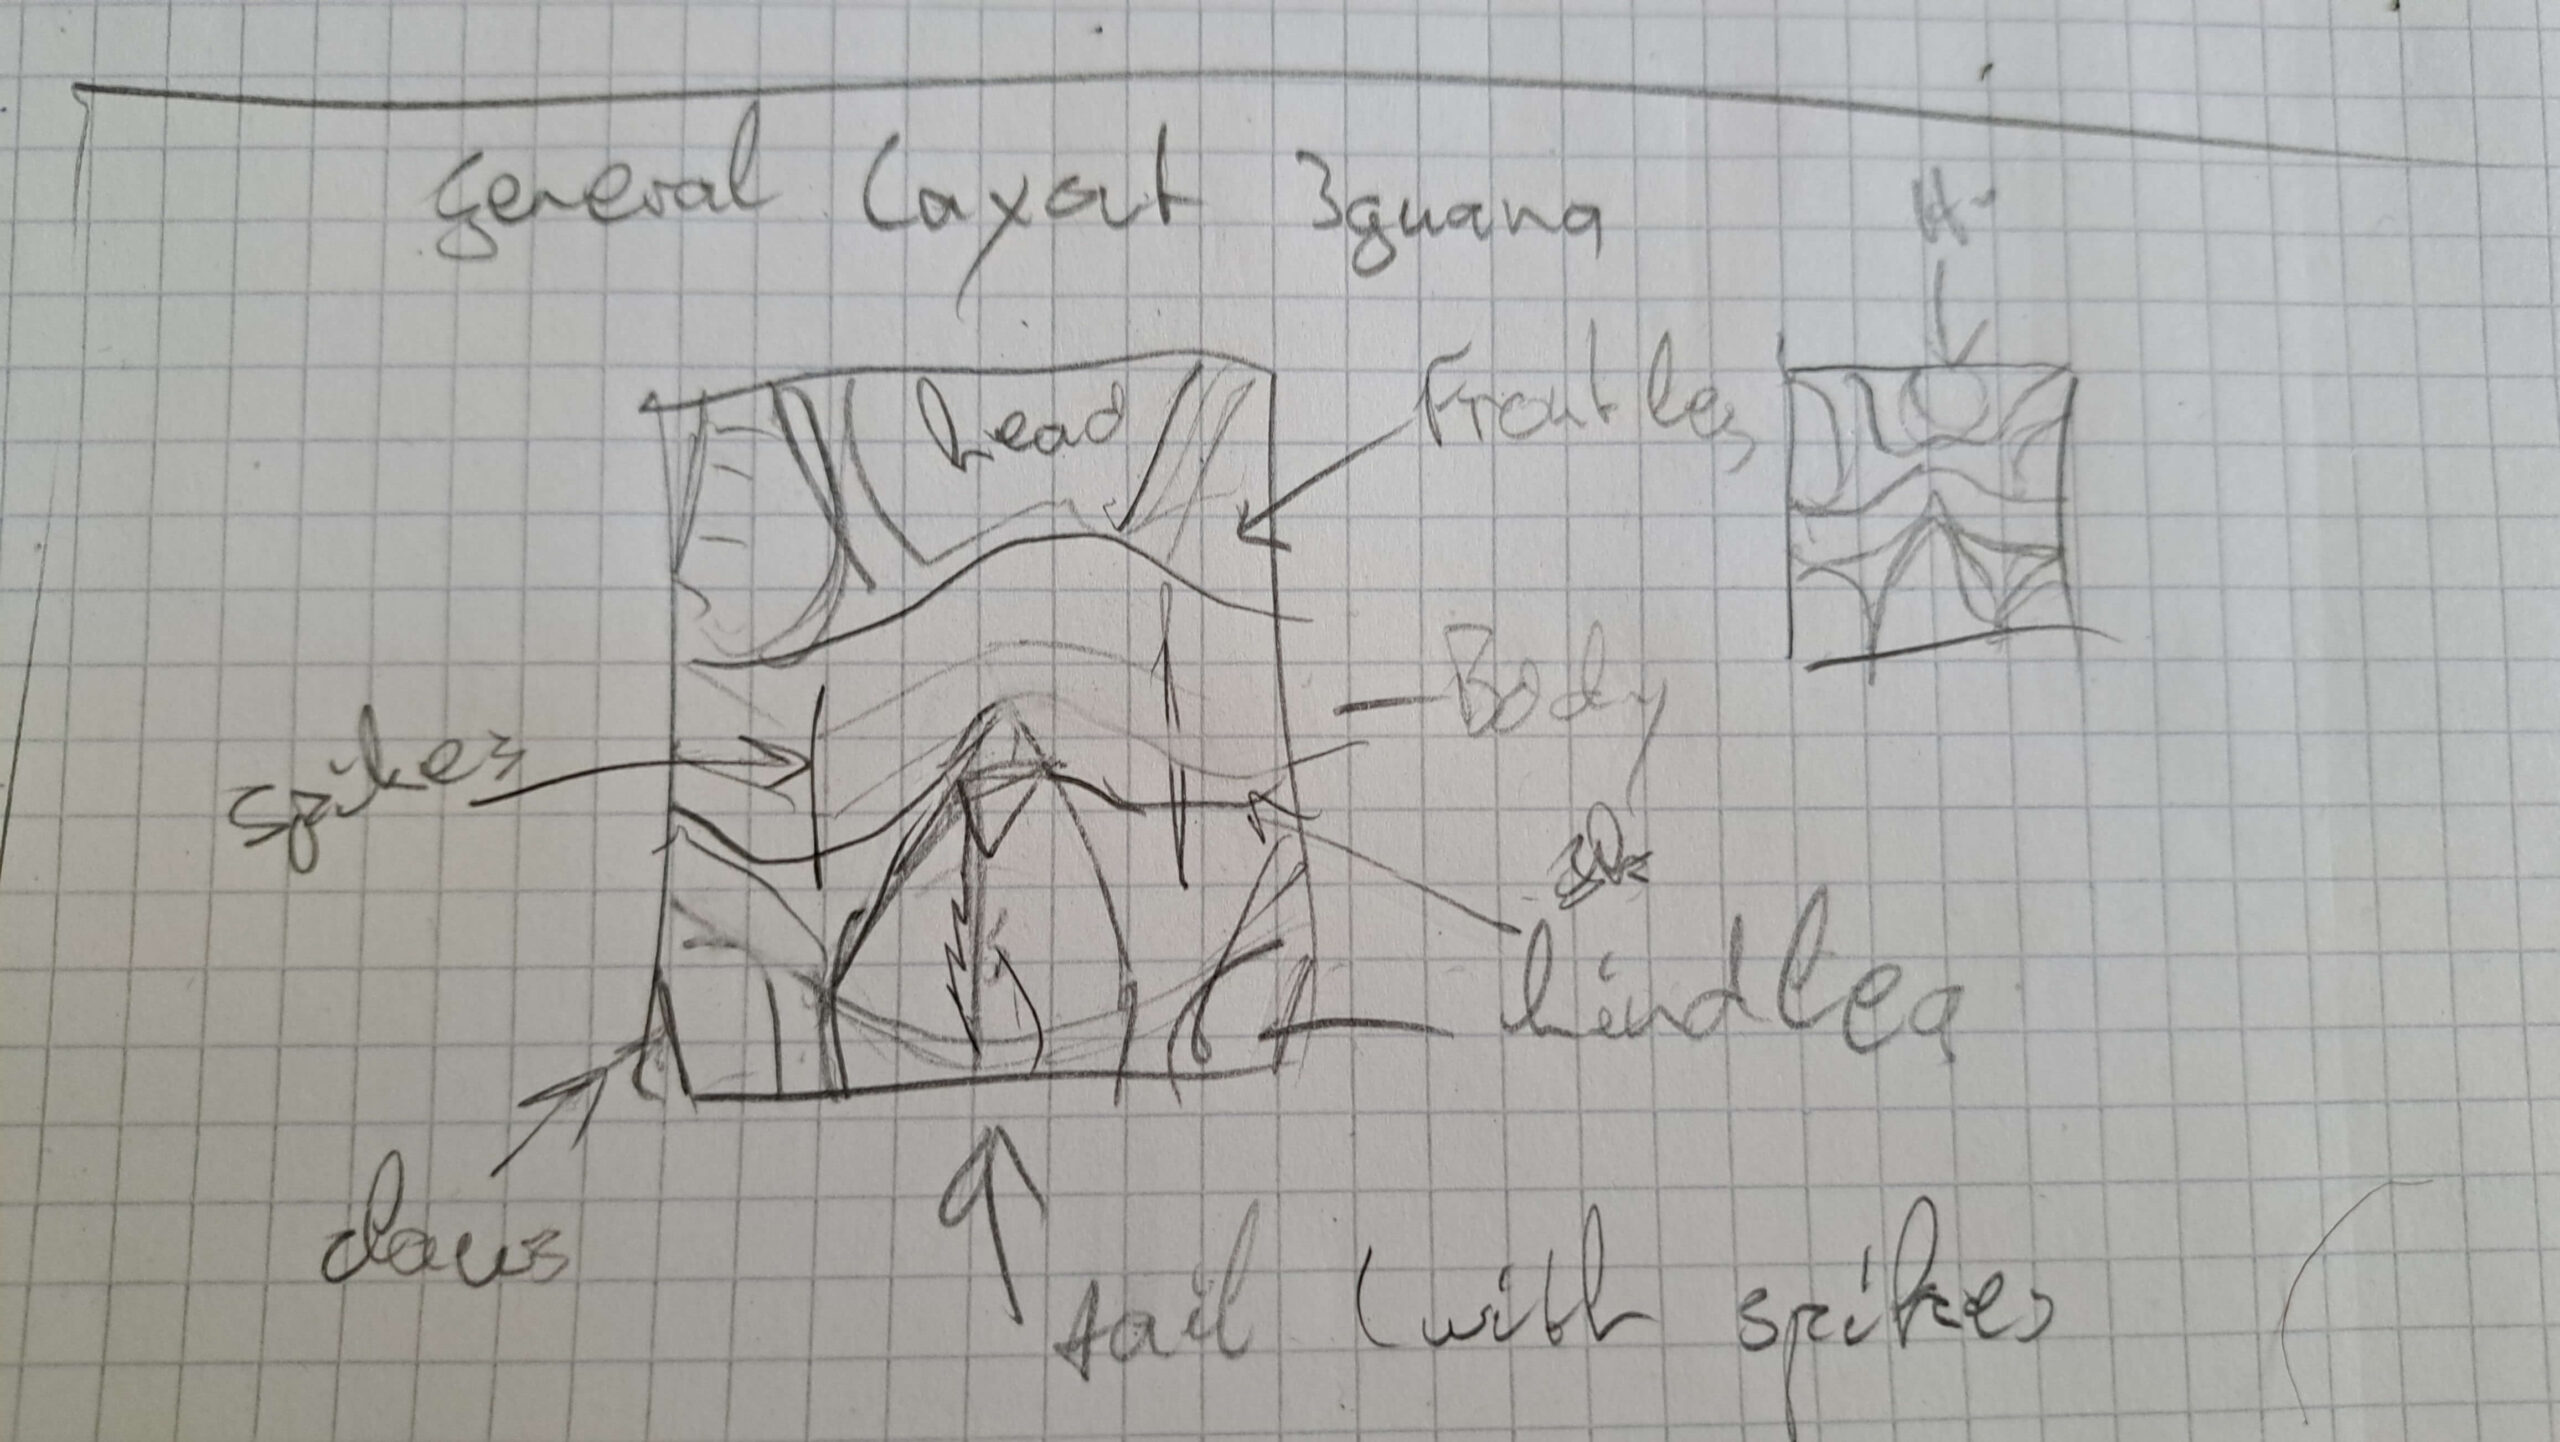
The sketch with the general layout of the Iguana V1
Why do I draw such a thing?
Before starting an actual crease pattern, I like to have an idea, how the model will work. For me, drawing a general layout has helped me settling for a packing. You can easily compare different packings, optimizing details or efficiency, trying to use unused paper, etc.
In many cases, the finished crease pattern will not completely resemble the general layout. The crease pattern features the details , the packing and the general layout are similar, but not identical.
Notes:
Try more than one general layout, you only need pencil and paper for them (or just think of different layouts).
I like to experiment with them to find the most efficient layout. Treemaker can be helpful for that, too. When there is no (or little) space left to fill and every part of the model uses just as much space as necessary, the general layout is very efficient.
If you want to make colour changes, think about how to implement them in the general layout. That’s easier than trying to squeeze them in afterwards.
Construct a crease pattern
Once I have a general layout in mind, I start drawing the crease pattern. It is the last and the most obvious part in designing a new model.
There are two methods I use for this phase.
- Folding and improvising
Mostly used for details, I use it to find small sections of the crease pattern and putting them together. - Using design theories
For connecting the small areas of the crease pattern, for making the packing similar to the model, I only draw the crease pattern. Again, I don´t have a set path, so I follow my gut, my experience (and sometimes my luck) to make a finished, flat-foldable crease pattern.
If you have grasped the basic concepts of Circle and Polygon Packing (mostly Boxpleating), you should be able to construct the crease pattern. Don´t be afraid if it doesn´t work or you are stuck, that´s where experience will arise from.
In theory, we are now finished. That´s when testing the model begins…
Notes:
This approach can lead to quite weird grids (e.g. the griffon). Don´t be afraid of odd grids with odd numbers. If the crease pattern is more elegant using such a grid, it will be worth it. If you don’t want such a thing, you might prevent that by using a little extra space to fit the packing in a “normal” grid.
You can also use freefolding, if you can´t solve a part of the crease pattern on paper. By now, I´ve got a whole box of funny transitions…
If you need more than one attempt for transforming a general layout in a crease pattern, that is no problem (I often need more than one until I´m satisfied with the crease pattern.